
Outus 24 Pcs Vinyl Pool Patch Repair Kit Self Adhesive Pool Liner Plastic Repair Patch Pool Patches for Above Ground Pools
- Vinyl Pool Repair Kit: you will receive 24 pieces of patches for air mattress repair, sufficient quantity.
- Invisible for Swimming Pool: the PVC repair patch is designed in sapphire blue, which can be invisible.
- Durable and Sticky: the swimming pool patch is mainly made of PVC material, waterproof and sturdy, strong.
- Using Method: you can clean the break place at first, and make the places dry, then put our pool float.

Aulock Exlarge Pool Liner Repair Patch - 4ft x 2.8ft Self-Adhesive PVC Vinyl Patch Kit for In-Ground or Above Ground Pools
- Large Size for Comprehensive Coverage: Measuring 4 x 2.8 feet, our self-adhesive patch is larger than.
- Strong Adhesive Strength: The self-adhesive PVC patch provides double the bonding power for a more secure.
- Easy to Use: Clean the leaking area thoroughly first. When cutting the patch, leave an extra 2 inches on.
- Versatile Repair Solution: This PVC patch is designed for versatile use. It can repair pool liners as well.

Aulock High-Viscosity Clear TPU Pool Patch Repair Kit - Underwater Patching, Self-Adhesive Pool Liner Patch for In-ground & Above
- Instant Leak Stop: Stop struggling with patches that curl at the edges; our high-viscosity TPU adhesive.
- True Underwater Application: Engineered for active scenarios, this waterproof repair tape can be applied.
- 0.3mm heavy duty TPU Material: While traditional thin PVC that punctures easily, our 0.3mm thickened TPU.
- 9.8ft Customizable Roll, Universal Vinyl Fix: No more "too small" pre-cut squares; this 4-inch wide by.
Algae growth, mineral deposits, and dirt can quickly accumulate on your above ground pool liner, making the water appear uninviting and potentially damaging the liner material over time. Regular cleaning not only improves the aesthetics of your pool but also helps maintain proper water chemistry and prevents premature wear. This guide explains how to clean above ground pool liner effectively and safely, addressing common issues like algae and stubborn stains.
Why Clean Your Above Ground Pool Liner?
A clean pool liner is essential for several reasons. First, visible dirt and stains detract from the enjoyment of your pool. Second, algae and biofilm on the liner can consume chlorine, making it harder to sanitize the water and keep it clear. This leads to increased chemical use. Third, prolonged exposure to certain stains, especially those from metals or harsh chemicals, can permanently discolor or weaken the vinyl material. Cleaning your above ground vinyl pool liner regularly preserves its appearance and integrity.
Tools and Materials You Will Need
Before you begin, gather the necessary supplies. Having everything ready streamlines the cleaning process.
- Soft-bristle pool brush (designed for vinyl liners)
- Pool vacuum (manual or robotic)
- Skimmer net
- Garden hose
- Bucket
- Clean cloths or sponges
- Goggles and gloves
- Pool-specific cleaning solutions (alkaline or acidic, depending on stain type)
- Mild household cleaner (e.g., dish soap, white vinegar, baking soda paste)
- Water testing kit
- Optional: Pool liner repair kit (for unexpected tears)
Safety First: Important Precautions
Working with pool chemicals and water requires caution. Always prioritize safety.
- Wear protective gear: Goggles protect your eyes from splashes, and chemical-resistant gloves shield your skin when handling cleaning solutions.
- Read chemical labels: Follow all manufacturer instructions for dilution, application, and safe handling of pool chemicals.
- Ventilation: If working in an enclosed area (unlikely for an above ground pool but still relevant for chemical storage), make sure there is good airflow.
- Avoid mixing chemicals: Never combine different pool chemicals unless explicitly instructed by the manufacturer, as this can create dangerous reactions.
- Test in a small area: Before applying any strong cleaner to a large section of your liner, test it on an inconspicuous spot to make sure it does not cause discoloration or damage.
- Turn off power: When working near the pool's pump or filter system, turn off all power to prevent accidental activation.
Method 1: How to Clean Above Ground Pool Liner While Full or Partially Full
Cleaning your liner without draining the pool is ideal for routine maintenance and addressing minor algae or surface dirt. This method usually takes 1-3 hours.
Step 1: Skim and Brush the Pool
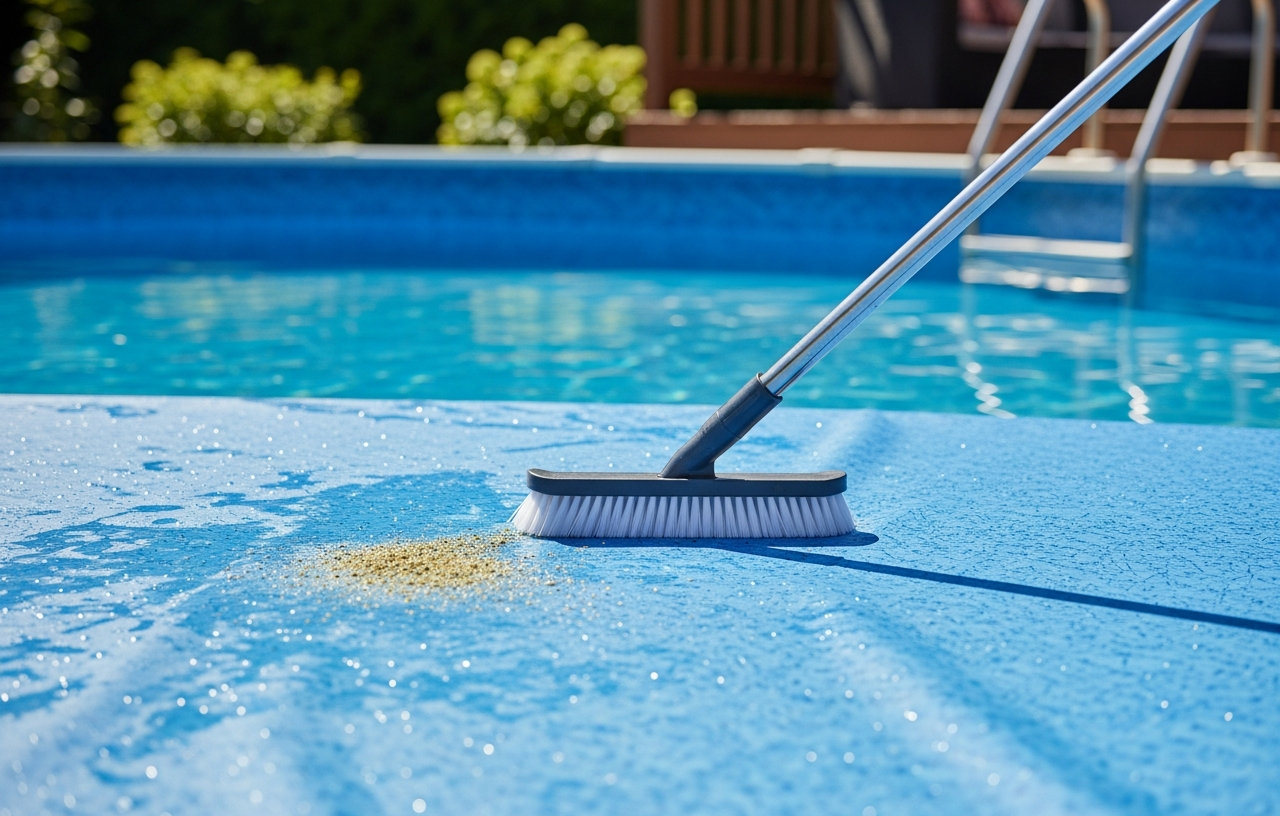
Start by removing any floating debris from the water's surface using a skimmer net. Then, attach a soft-bristle brush to your telescoping pole. Gently brush all surfaces of the liner, paying close attention to the waterline and any visible stained areas. This dislodges loose dirt and algae, allowing your filtration system to capture it. Brush walls and floor thoroughly. For optimal results, brush at least once a week.
Step 2: Balance Water Chemistry
Imbalanced water chemistry can contribute to algae growth and staining. Test your pool water and adjust pH, alkalinity, and sanitizer levels as needed. A pH level between 7.4 and 7.6 is generally recommended. If your pH is high, you may need to add a pH reducer. Learn more about how to lower pool pH for clear water. Proper water chemistry makes your sanitizer more effective against algae.
Step 3: Shock the Pool (If Algae is Present)
If you see green or black algae, shocking the pool is necessary. Follow the instructions on your pool shock product. Typically, you will add a large dose of chlorine to kill the algae. Run your pool filter continuously for 24-48 hours after shocking. You may need to brush the liner again to remove dead algae particles.
Step 4: Vacuum the Pool
After brushing and shocking, vacuum the pool to remove all the dislodged debris and dead algae. For heavy debris, vacuum to waste if your filter allows, to avoid clogging the filter. If your pool pump is not priming effectively, you may need to troubleshoot that issue first. Find help with a pool pump not priming fix guide. Consider using a robotic pool cleaner for easier regular maintenance.
Step 5: Spot Clean the Waterline
The waterline often collects a greasy film or scum line from suntan lotions, body oils, and environmental debris. Use a soft sponge or cloth with a pool-specific waterline cleaner. Make sure the cleaner is safe for vinyl liners. You can also use a paste of baking soda and a small amount of water for a gentle abrasive scrub. Rub gently to avoid damaging the liner.
Method 2: How to Clean Above Ground Pool Liner After Draining
Draining your pool allows for a more thorough cleaning, especially when dealing with heavy staining, significant algae buildup, or preparing for winterization. This method can take several hours to a full day, not including draining and refilling time.
Step 1: Drain the Pool
Before draining, check local regulations regarding wastewater disposal. You can use a submersible pump to drain the water. Position the pump in the deepest part of the pool and direct the discharge hose to an appropriate drainage area. This process can take several hours, depending on your pump's power and pool size.
Step 2: Rinse Away Loose Debris
Once the pool is empty, use a garden hose with a strong nozzle setting to rinse down the liner. Start from the top and work your way down, flushing loose dirt, leaves, and other debris towards the main drain or an exit point. Remove as much physical debris as possible before scrubbing.
Step 3: Scrub the Liner with a Mild Cleaner
Mix a mild cleaning solution. Options include:
- Dish Soap and Water: A few drops of mild dish soap in a bucket of warm water.
- White Vinegar and Water: A 1:1 mixture of white vinegar and water is effective for mineral deposits and light stains.
- Baking Soda Paste: For tougher spots, mix baking soda with a small amount of water to form a paste.
Apply your chosen solution to sections of the liner using a soft sponge or cloth. Scrub gently in circular motions. For how to clean algae off above ground pool liner that has dried, a vinegar solution or baking soda paste can work well. Apply, let it sit for 5-10 minutes, then scrub.
Step 4: How to Remove Stains from Above Ground Pool Liner
Different types of stains require different approaches. This is how to clean a stained above ground pool liner effectively.
-
Organic Stains (Algae, Leaves, Dirt): These are usually green, brown, or black. Mild dish soap, vinegar, or a chlorine-based cleaner (diluted bleach solution, 1 part bleach to 10 parts water) can be effective. Apply the solution, let it sit for 10-15 minutes, then scrub and rinse thoroughly. Always test bleach on an inconspicuous area first.
-
Metal Stains (Rust, Copper): These often appear as reddish-brown, blue-green, or black spots. They are caused by metal particles in the water. An ascorbic acid (Vitamin C) powder or a commercial metal stain remover designed for pools works best. Make a paste with the powder and water, apply directly to the stain, let it sit for 15-30 minutes, then scrub and rinse. These stains can be tricky, and sometimes professional help is needed if they are deeply set.
-
Oil/Grease Stains: These appear as a slick film or dark spots. Mild dish soap or a degreaser designed for pools can dissolve them. Apply, scrub, and rinse well.
Step 5: Rinse the Entire Liner Thoroughly
After scrubbing and stain treatment, rinse the entire liner surface with a garden hose. Make sure to remove all cleaning solution residue. Leftover chemicals can impact your new pool water chemistry or damage the liner over time.
Step 6: Inspect and Repair Any Damage
With the liner clean and dry, inspect it for any small tears, holes, or weakened areas. Even tiny punctures can lead to leaks when the pool is refilled. A vinyl pool repair kit is essential for addressing these issues. Products like the Outus 24 Pcs Vinyl Pool Patch Repair Kit offer sufficient quantity for multiple repairs, with a sapphire blue design that blends in. For larger tears, consider the Aulock Exlarge Pool Liner Repair Patch, which provides comprehensive coverage with strong adhesive. If you need to patch underwater, the Aulock High-Viscosity Clear TPU Pool Patch Repair Kit offers instant leak stopping with heavy duty TPU material. Clean and dry the area around any damage before applying a patch according to the kit's instructions. A professional liner repair can cost $150-$400, depending on the damage and location, not including the service call fee which averages $80-$150.
Step 7: Refill Your Pool
Once all cleaning and repairs are complete, begin refilling your pool. As the water level rises, smooth out any wrinkles in the liner by gently pushing them towards the walls. Once full, test and balance your water chemistry before adding sanitizer. Refer to our guide on how to open your pool for summer for a complete checklist.
Preventative Maintenance for a Clean Liner
Regular maintenance reduces the need for extensive cleaning.
- Maintain Water Chemistry: Test your water 2-3 times a week and adjust chemicals as needed. Balanced water prevents algae and scaling.
- Regular Brushing and Skimming: Daily skimming and weekly brushing remove debris before it can settle and stain.
- Filter Maintenance: Keep your pool filter clean and running efficiently. A dirty filter cannot remove contaminants effectively.
- Shock Regularly: Weekly or bi-weekly shocking, especially during heavy use or hot weather, prevents algae blooms.
- Clean Pool Toys and Accessories: Make sure toys, floats, and other pool accessories are clean before they enter the water.
- Shower Before Swimming: Ask swimmers to rinse off before entering the pool to reduce the amount of oils and dirt introduced.
Conclusion
Learning how to clean an above ground pool liner is a simple yet essential part of pool ownership. Whether you are tackling routine maintenance or removing stubborn stains after draining, using the right tools and techniques will keep your pool looking its best. Consistent water chemistry management and regular physical cleaning will extend the life of your liner and make sure your pool remains a sparkling oasis for years to come. Remember to always prioritize safety when handling chemicals and operating pool equipment.
Outus 24 Pcs Vinyl Pool Patch Repair Kit Self Adhesive Pool Liner Plastic Repair Patch Pool Patches for Above Ground Pools
- Vinyl Pool Repair Kit: you will receive 24 pieces of patches for air mattress repair, sufficient quantity.
- Invisible for Swimming Pool: the PVC repair patch is designed in sapphire blue, which can be invisible.
- Durable and Sticky: the swimming pool patch is mainly made of PVC material, waterproof and sturdy, strong.
- Using Method: you can clean the break place at first, and make the places dry, then put our pool float.
Aulock Exlarge Pool Liner Repair Patch - 4ft x 2.8ft Self-Adhesive PVC Vinyl Patch Kit for In-Ground or Above Ground Pools
- Large Size for Comprehensive Coverage: Measuring 4 x 2.8 feet, our self-adhesive patch is larger than.
- Strong Adhesive Strength: The self-adhesive PVC patch provides double the bonding power for a more secure.
- Easy to Use: Clean the leaking area thoroughly first. When cutting the patch, leave an extra 2 inches on.
- Versatile Repair Solution: This PVC patch is designed for versatile use. It can repair pool liners as well.
Aulock High-Viscosity Clear TPU Pool Patch Repair Kit - Underwater Patching, Self-Adhesive Pool Liner Patch for In-ground & Above
- Instant Leak Stop: Stop struggling with patches that curl at the edges; our high-viscosity TPU adhesive.
- True Underwater Application: Engineered for active scenarios, this waterproof repair tape can be applied.
- 0.3mm heavy duty TPU Material: While traditional thin PVC that punctures easily, our 0.3mm thickened TPU.
- 9.8ft Customizable Roll, Universal Vinyl Fix: No more "too small" pre-cut squares; this 4-inch wide by.